Table of Contents
Imagine having an endless supply of your favorite tomato variety, or easily replacing a plant lost to disease or an unexpected garden mishap. What if you could extend your growing season, getting a head start on next year’s crop without buying new seeds or plants? This isn’t a gardener’s fantasy; it’s a remarkably simple reality thanks to the incredible regenerative power of the tomato plant. The question, “Can you propagate a tomato plant?” is met with a resounding yes!
Tomato propagation from cuttings is one of the easiest and most rewarding gardening techniques you can master. Unlike many other plants that require specific conditions or complex procedures, tomatoes readily root from simple stem cuttings, often without any special equipment or rooting hormones. This means you can transform a single plant into dozens, preserve heirloom varieties, replace stressed plants, and even get a jump on an early harvest—all for free.
This comprehensive guide will delve into the straightforward process of rooting tomato plant cuttings. We’ll explore various methods, from water propagation to direct soil planting, discuss how to handle unexpected broken stems, and provide all the tips and tricks you need to successfully multiply your tomato bounty, ensuring you never run out of your beloved red (or yellow, or purple!) fruit.
Can You Propagate a Tomato Plant in Water?
Propagating tomato plants in water is arguably the easiest and most foolproof method, perfect for beginners and seasoned gardeners alike. It provides a fascinating visual of the rooting process and requires minimal supplies.
Why Water Propagation Works So Well:
Tomato stems possess a remarkable ability to form adventitious roots—roots that grow from non-root tissue—along their stems. When a cutting is placed in water, these roots readily emerge from the submerged portion of the stem.
The Simple Steps for Water Propagation:
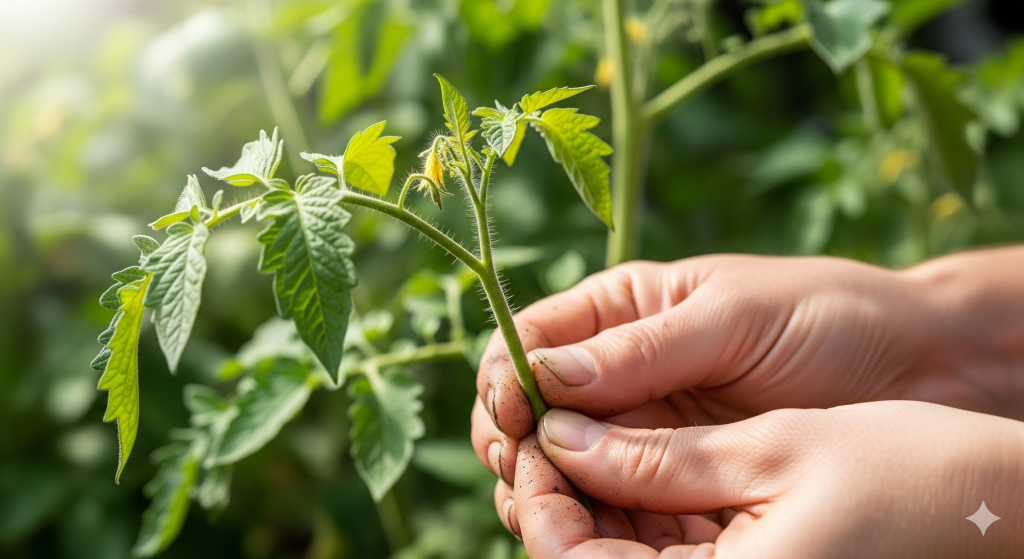
- Select Your Cutting: Look for a “sucker” (the small shoot that grows in the crotch between the main stem and a leaf branch) that is 4-8 inches long. Suckers are ideal because they are already genetically identical to the parent plant and, when removed, help the main plant put more energy into fruit production. You can also use the tip of a healthy side branch if you don’t have suitable suckers.
- Prepare the Cutting:
- Carefully snip the chosen sucker or branch using clean, sharp pruning shears or scissors. Make the cut just below a leaf node (the point where a leaf attaches to the stem).
- Remove any leaves that would be submerged in water. Leaves left in water will rot, fouling the water and potentially harming the cutting. You want at least 2-3 sets of leaves above the waterline.
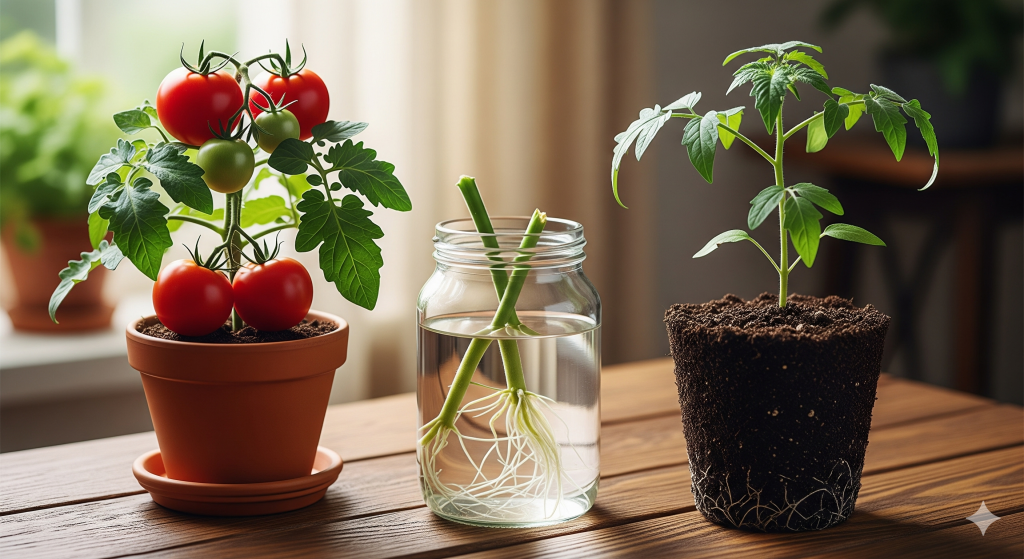
- Place in Water: Put the prepared cutting into a clear glass or jar filled with clean water. Room temperature water is fine.
- Choose the Right Location: Place the jar in a warm spot that receives bright, indirect light. Avoid direct, intense sunlight, which can overheat the water and stress the cutting. A windowsill that gets good ambient light is often perfect.
- Maintain the Water:
- Change the water every 1-2 days. This is crucial to prevent bacterial growth and to replenish oxygen in the water, which the developing roots need.
- Top off the water level as needed if it evaporates.
- Observe for Roots: You should see tiny white roots beginning to emerge from the stem within 5-14 days. The speed of rooting depends on the variety of tomato and environmental conditions.
- Potting Up: Once the roots are at least 1-2 inches long and there are several roots (typically around 2-3 weeks), your cutting is ready to be transplanted into potting soil.
Ready to Take Your Self-Sufficiency to the Next Level?

If you love the self-sufficient lifestyle, this is the only guide you’ll ever need. Learn how to generate your own power, secure your water supply, and become truly independent. No fluff, just actionable plans.
➡️ Check out The Self-Sufficient Backyard and start your journey today!
Can You Propagate a Tomato Plant From a Cutting?
Yes, absolutely! Propagating tomatoes from cuttings is a highly effective method to produce new, genetically identical plants. This technique allows you to bypass the seed-starting phase, resulting in larger, more mature plants in a shorter amount of time, which can significantly accelerate your harvest.
The principles are similar to water propagation, but instead of water, the cutting is directly placed into a rooting medium.
Methods for Propagating Tomato Cuttings (Direct to Soil/Medium):
- Select and Prepare the Cutting: As with water propagation, choose a healthy sucker or branch tip that is 4-8 inches long. Remove any lower leaves that would be buried in the soil. You can leave 2-4 leaves at the top.
- Optional: Rooting Hormone: While not strictly necessary for tomatoes (they root so easily!), using a rooting hormone (powder or gel) can sometimes speed up the process and increase the success rate. Dip the cut end of the stem into the rooting hormone according to the product’s instructions.
- Prepare the Potting Medium: Fill small pots (3-4 inches) or a seed tray with a sterile, well-draining potting mix. A good mix typically contains peat moss, perlite, and/or vermiculite. Avoid heavy garden soil, which can compact and cause rot. Moisten the potting mix thoroughly before planting.
- Insert the Cutting: Use a pencil or your finger to create a small hole in the center of the moistened potting mix. Gently insert the prepared cutting into the hole, ensuring that at least 2-3 leaf nodes are buried. Firm the soil lightly around the stem to ensure good contact.
- Water and Cover (Optional but Recommended): Lightly water the newly planted cutting to settle the soil. To maintain high humidity around the cutting (which aids rooting), you can create a mini-greenhouse effect. Cover the pot with a clear plastic dome, a plastic bag, or even the top half of a plastic bottle. Ensure the plastic doesn’t touch the leaves directly.
- Provide Ideal Conditions: Place the pots in a warm spot with bright, indirect light. Keep the potting mix consistently moist but not soggy. If using a cover, occasionally vent it for an hour to allow for air circulation and prevent fungal issues.
- Test for Rooting: After 2-3 weeks, gently tug on the cutting. If you feel resistance, it means roots have formed. You might also see new leaf growth. Once established, remove the plastic cover (if used) and gradually acclimate the new plant to drier air.
Can You Root a Tomato Plant Cutting in Soil?
Yes, absolutely. As described above, rooting a tomato plant cutting directly in soil or a soilless potting mix is a very effective and widely used method. The key is to use a light, well-draining medium that provides aeration and holds moisture without becoming waterlogged. This environment encourages rapid root development and reduces the risk of the cutting rotting before it can establish.
Can I Propagate a Broken Tomato Plant?
This is one of the most practical and satisfying applications of tomato propagation! If you accidentally snap a branch off a beloved tomato plant, or if a strong wind or clumsy pet causes damage, do not despair – you can almost certainly propagate the broken piece.
Treat a broken tomato stem exactly as you would a purposefully selected cutting:
- Assess the Break: If the break is clean and the stem isn’t too badly crushed or damaged, you have a good candidate.
- Clean Up the Cutting: Trim the broken end cleanly with sharp shears, removing any ragged edges. Aim for a cutting that is 4-10 inches long.
- Remove Lower Leaves: As usual, remove any leaves that would be below the waterline or buried in the soil.
- Root It! Place the prepared cutting into a jar of water or directly into a pot of moist, sterile potting mix. Provide the appropriate conditions (warmth, bright indirect light, consistent moisture).
This ability to propagate broken stems means that a garden mishap doesn’t have to be a total loss. Instead, it can become an opportunity to gain an extra, healthy tomato plant! This is particularly useful if the broken piece is from a unique or favorite heirloom variety that you want to multiply.
Advantages of Propagating Broken Stems:
- Rescue Mission: Salvage a valuable part of your plant that would otherwise be discarded.
- Genetic Duplication: Preserve the exact genetics of a high-performing or rare plant.
- Faster Recovery: The “mother” plant can often recover faster once the broken piece is removed, and the propagated cutting gives you a bonus plant.
Conclusion
The ability to propagate tomato plants from cuttings is a truly invaluable skill for any gardener. It’s a testament to the plant’s inherent resilience and a wonderfully sustainable practice that offers a multitude of benefits. Whether you’re a beginner simply curious about the process or a seasoned grower looking to expand your harvest, rooting tomato cuttings is surprisingly easy and incredibly rewarding.
From extending your growing season by taking cuttings in late summer, to ensuring a steady supply of your favorite varieties, to simply rescuing a broken branch, the power of propagation puts more tomatoes in your hands. With just a few simple tools and a little bit of care, you can transform a single tomato plant into an endless source of delicious, homegrown fruit, proving that a little bit of gardening know-how can yield bountiful rewards. So, go ahead—snip a sucker, place it in water or soil, and prepare to be amazed as you witness the magic of tomato propagation unfold. Happy growing!